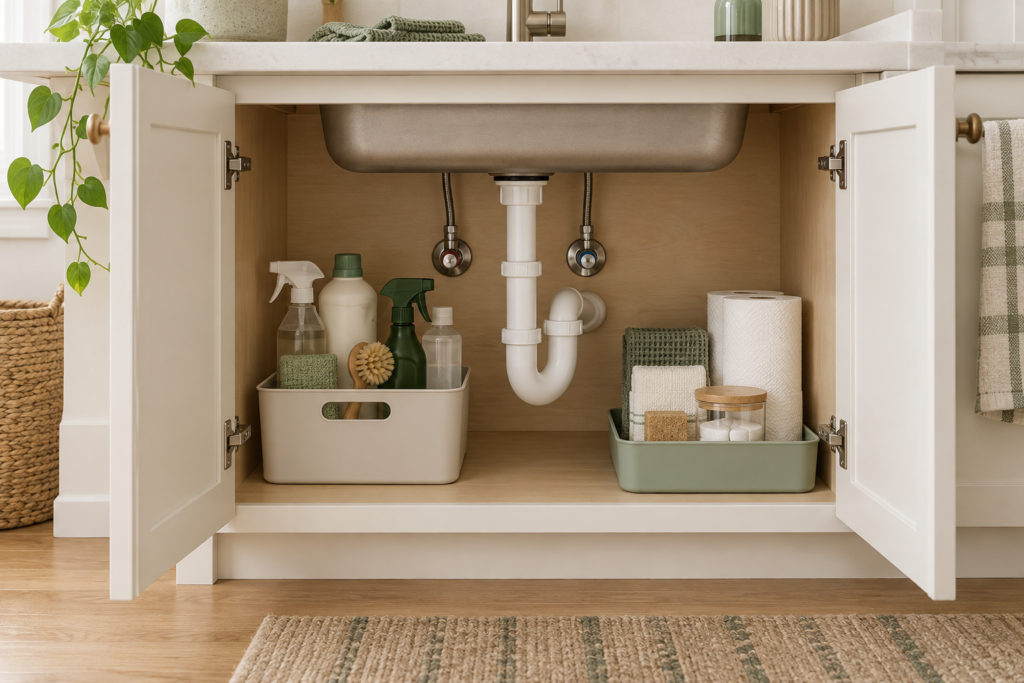
For under sink storage, measure the usable spaces around the pipes, keep access to shutoff valves clear, and give everyday supplies a removable front zone. Choose a caddy for portability, a shelf for usable height, or a pull-out basket for a deep cabinet. Test the full movement of the organizer with bottles inside before committing to a layout.
An under-sink cabinet is an awkward storage space because it also has a working job: it houses plumbing that you may need to reach quickly. A large organizer can fit through the doors and still fail once its top shelf meets the sink bowl or its drawer catches a hinge. The most useful layout starts with those restrictions instead of trying to copy a photograph.
This guide takes you from an empty cabinet to a measured layout, then explains which organizer features are worth comparing. It covers kitchens and bathroom vanities, with particular attention to small cabinets and rental homes. The comparisons describe storage designs, not products we have tested. For our approach to recommendations, see the Tidy Nook Living editorial policy.
Measure the space you can actually use
Empty the cabinet before measuring. Keep cleaning products upright and securely out of reach of children and pets while you work. Check for dampness, damaged shelving, loose fittings, or a persistent smell. Resolve an active leak before covering the floor with a mat or placing storage over it. An organizer cannot repair water damage, and a closed bin can hide an ongoing problem.
You need a tape measure, paper, and the tallest items that will return to the cabinet. Make a simple drawing from above. Mark the drain trap, supply lines, shutoff valves, any disposal unit, electrical fittings, and the hinges. Include the centre stile if the cabinet has a fixed strip between its doors. That strip may divide a wide cabinet into two much narrower access openings.
Record five separate measurements
- Door opening: measure the narrowest clear opening with the door fully open, accounting for hinges.
- Usable floor width: measure each uninterrupted section beside the plumbing, rather than the overall cabinet width alone.
- Usable depth: measure from the inside of the closed door to the first obstruction on the intended storage path.
- Usable height: measure to the lowest obstruction above each proposed zone. The sink bowl and pipes may create different heights on the left and right.
- Removal space: check how far a drawer must extend and how high a caddy must lift before you can remove it.
Write down both the organizer’s outside dimensions and its usable interior dimensions when shopping. Thick walls, curved sides, handles, rails, and feet can consume space that the main product photograph does not make obvious. An advertised width may refer to the shelf surface rather than the whole assembled frame, so consult the dimension diagram.
A worked measurement example
Imagine that the clear space beside your pipes is 24 cm wide, 40 cm deep, and 38 cm high. These are example measurements, not a recommended standard. A caddy measuring 22 by 35 cm at its base could sit there, but it still needs checking at its widest point. A handle projecting to 25 cm would make it too wide, even though the base fits.
Now suppose your tallest spray bottle is 31 cm high and a shelf platform would raise it by 8 cm. The resulting 39 cm height exceeds the available 38 cm. This is why measuring empty organizers alone fails. Include the contents, then allow whatever clearance the manufacturer specifies and enough practical room to grasp and replace each item without scraping the plumbing.
Create three zones without filling every gap
Zone one: everyday items at the front
Choose the small set of tools you reach for during normal cleaning, such as a brush, a dry cloth, and the appropriate cleaning product for the task. Keep them together in a container you can remove easily. The aim is to take out one group without moving several unrelated bottles. If the caddy becomes heavy or crowded, reduce the contents instead of selecting a larger one automatically.
Pay attention to the return movement. A brush that slides into a narrow compartment in an empty caddy may not go back easily when the bottles are present. Try replacing it with one hand while the other hand holds the door. This simple test often reveals whether tall dividers or an oversized handle will make daily use frustrating.
Zone two: limited reserves to one side
Group spare cloths and other suitable supplies separately from active products. Keep only reserves that fit without concealing the first zone. If you routinely buy multipacks, store excess stock in another suitable location rather than forcing every refill under the sink. Give that reserve location a label so another member of the household does not open a new package simply because they cannot find the existing one.
Separate clean, dry textiles from used or damp tools. Do not pack a wet cloth into a closed container and expect the cabinet to become a drying area. Establish a separate place for items to dry, then return them once appropriate. For a bathroom vanity, the small bathroom essentials guide helps decide which daily items belong nearer the basin instead.
Zone three: plumbing access stays open
The remaining area is a service zone, not spare capacity. You should be able to see the plumbing and reach the shutoff valves without dismantling a shelf. Avoid wedging containers against flexible hoses or resting storage on pipes. Follow any equipment clearances specified by the relevant manufacturer, particularly where a disposal, filter system, or other appliance occupies part of the cabinet.
There is no universal percentage of the cabinet that must remain empty. The practical test is whether a person can reach the components they may need and remove the surrounding storage promptly. A smaller removable bin is often more useful here than a perfectly fitted built-in arrangement that prevents access.
Decide what should not go under the sink
Do not use a low cabinet as an unsecured chemical store where children or pets can reach it. The US Environmental Protection Agency’s household safety guidance recommends keeping household chemicals out of children’s reach, preferably in a locked cabinet. Keep products in their original labelled packaging and follow their specific storage directions. A decorative bottle should not replace packaging that carries usage and emergency information.
Keep food storage separate from this cleaning zone. Paper packaging, spare tissues, and valued textiles are also poor candidates where a leak could damage them. Before returning any item, ask whether it actually benefits from this location. If its only reason for being there is that it has always been there, consider another home during your whole-home storage reset.
Compare under-sink organizer types
| Type | Useful for | Main compromise | Check before buying |
|---|---|---|---|
| Removable caddy | Carrying a small cleaning kit | Limited use of vertical space | Loaded weight, handle clearance, interior width |
| Adjustable shelf | Separating low items into two levels | Legs and upper platform may conflict with pipes | Exact post positions, shelf height, load rating |
| Pull-out basket | Reaching items in a deep cabinet | Needs an unobstructed travel path | Extension length, mounting, hinge clearance |
| Turntable | Small bottles in an open square zone | Circular shape leaves unused corners | Full rotation with contents loaded |
| Door-mounted holder | Light, frequently used accessories | Can collide with interior storage | Door thickness, mounting method, closing clearance |
When a removable caddy makes the most sense
A caddy suits a small cabinet with irregular plumbing because it does not need a permanent travel mechanism. Lift it out, take the tools to the task, and return the entire group. A simple open design also makes it easy to inspect beneath the container. Look for a stable base and a handle that remains comfortable when loaded with the quantity you actually use.
A divided caddy can stop small accessories shifting, but fixed compartments may reject your widest bottle. Compare the space within each section, not only the total width. If you carry supplies between floors, consider whether a lighter kit would solve the problem better than a larger container. Portability loses its value when the caddy is inconvenient to lift.
When an adjustable shelf earns its space
A shelf can create a useful upper level for short, dry accessories while leaving another category below. Its strongest use case is a clear vertical area beside the plumbing. An expandable design may bridge part of a cabinet, but expansion alone does not guarantee that the supports avoid the drain trap. Check where every leg lands in both the narrow and extended configurations.
Also check whether the upper tray is removable and whether changing its position alters the rated capacity. Do not assume that stackable means suitable for an unlimited number of levels. Follow the manufacturer’s assembly and loading instructions. If access to the upper shelf requires taking out the lower bin each time, two levels may add work without adding useful storage.
When to consider a pull-out basket
A sliding basket is useful when depth, rather than height, is the main problem. It brings rear items towards you so you can see them. But the entire loaded basket must pass the hinges, centre stile, pipes, and nearby bins. Include protruding spray triggers and caddy handles in that movement check; an empty basket can slide smoothly while a full one catches.
Compare freestanding and fixed designs carefully. A fixed rail system may require screws and a sound mounting surface. A freestanding option avoids those fixing points but may move or tip if used contrary to its instructions. In a rental, check what alterations are permitted before buying a product that requires drilling. Never assume a thin cabinet panel can take any screw length.
Three practical layouts to test
Narrow cabinet with a central drain
Start with one slim removable bin on each accessible side rather than one wide shelf across the whole cabinet. Put the daily kit on the side with the easiest opening. Use the second bin only for suitable reserves. Leave the space below and around the drain visible. If one side cannot accommodate a useful container, keep it clear instead of purchasing a tiny organizer simply to fill it.
Wide kitchen cabinet with an appliance inside
Treat the appliance side and the clear side as separate spaces. A pull-out organizer may work on the unobstructed side, while the other remains available for equipment access. Check the appliance documentation before placing storage nearby. Keep the route to valves and connections straightforward; a wider cabinet can still have very little continuous usable floor area.
Bathroom vanity shared by two people
First distinguish personal-care storage from cleaning storage. Two labelled personal bins can reduce mix-ups, but the lower plumbing cabinet may not be the best location for every daily item. Put frequently used essentials in a suitable accessible zone and keep chemical products secured separately. Match container height to the basin shape, which often projects farther into a vanity than expected.
A buying checklist that prevents the wrong purchase
Start with a single problem statement: “I cannot reach the rear bottles,” “the brush disappears behind refills,” or “I need to carry the cleaning kit.” That statement should determine the product type. Buying a large coordinated set before identifying the problem often produces unused pieces and forces you to organize around the containers.
- Fit: compare assembled external dimensions, internal compartments, and the positions of handles and feet.
- Movement: confirm drawer extension, door swing, and the space required to lift a container out.
- Materials: read the stated care instructions and suitability for the intended environment; appearance alone does not establish moisture resistance.
- Installation: check included fixings, required tools, compatible surfaces, and whether modifications are necessary.
- Capacity: use the manufacturer’s rating and loading conditions, including any separate limit for an upper shelf.
- Maintenance: prefer a design you can empty and clean without disassembling half the cabinet.
- Local listing: confirm the exact model, dimensions, return conditions, and availability in your country.
For a worldwide purchase, convert dimensions before comparing them. One inch equals 2.54 centimetres. A listing in inches may look numerically smaller than one in centimetres while describing a larger organizer. Compare the same unit and the same dimensions, and check whether the diagram describes packaging or the assembled product. Use our storage buying guides for the wider evaluation process.
Fix common under-sink storage problems
The drawer stops halfway out
Empty it and identify the exact contact point. If the frame hits a hinge, relocating the organizer or choosing a narrower design may help. If only the bottles hit, rearrange the contents or use a lower-profile storage format. Do not force the drawer past plumbing. The solution depends on what catches, so distinguish a frame problem from a contents problem before replacing anything.
The cabinet becomes crowded again
Look at the items entering the space. Duplicate refills, unrelated tools, and partially used products often arrive without a defined place. Separate active supplies from reserves and set a physical limit, such as one designated reserve bin. Review that bin before shopping. When the available storage is full, make a decision about the contents instead of creating a second hidden layer.
A mat or bin conceals moisture
Remove the covering and investigate the source. A protective tray can make a small spill easier to notice and clean, but it does not make the cabinet waterproof or eliminate the need for inspection. Choose a layout that lets you lift out the tray easily. If moisture returns, address the underlying cause before restoring the arrangement.
Run a one-week usability check
Use the new layout during ordinary routines before buying additional pieces. Notice which items you move to reach others, which are left on the counter because returning them is awkward, and whether another person understands the grouping. Change one thing at a time: move the daily bin forward, reduce the reserve quantity, or remove an unnecessary divider.
At the end of the week, take out the containers and inspect the cabinet floor. Then reload them as you would after cleaning. The arrangement passes when doors close freely, each item returns without a struggle, storage removes easily, and plumbing remains accessible. A photograph can record the layout for the household, but everyday access is the more useful measure of success.
Questions about under sink storage
What is the best organizer for a small under-sink cabinet?
A compact removable caddy is a sensible starting point when pipes leave irregular gaps. A shelf or pull-out may be more useful if you have a clear rectangular area and need vertical separation or rear access. Measure the loaded setup before deciding; there is no single design that fits every small cabinet.
Can I organize under the sink without drilling?
Yes. Freestanding caddies, suitable trays, and some shelves do not require fixing holes. Check each product’s instructions because designs vary. Door hooks and adhesive holders also need compatibility checks, and a no-drill label does not by itself guarantee that a product will fit your door or leave a surface undamaged.
Should I put a turntable under the sink?
A turntable can help with small bottles if an open area allows the entire loaded unit to rotate. It is less useful when pipes interrupt the circle or when tall bottles strike the sink bowl. Test the full diameter and height together, and compare the lost corner space with a rectangular bin.
How do I organize around a garbage disposal?
Map the disposal and its connections as fixed obstructions, follow the equipment’s clearance requirements, and use the separate open area for storage. Do not suspend organizers from plumbing or push bottles against connections. A smaller removable kit may be more appropriate than an organizer that spans the whole cabinet.
Do matching containers improve the system?
Matching containers can make categories easy to recognize, but fit and access matter more than a uniform appearance. Reuse suitable containers first, then replace only a piece that fails a specific job. A mixed set of well-fitting bins can work better than a coordinated set with oversized handles or unusable compartments.