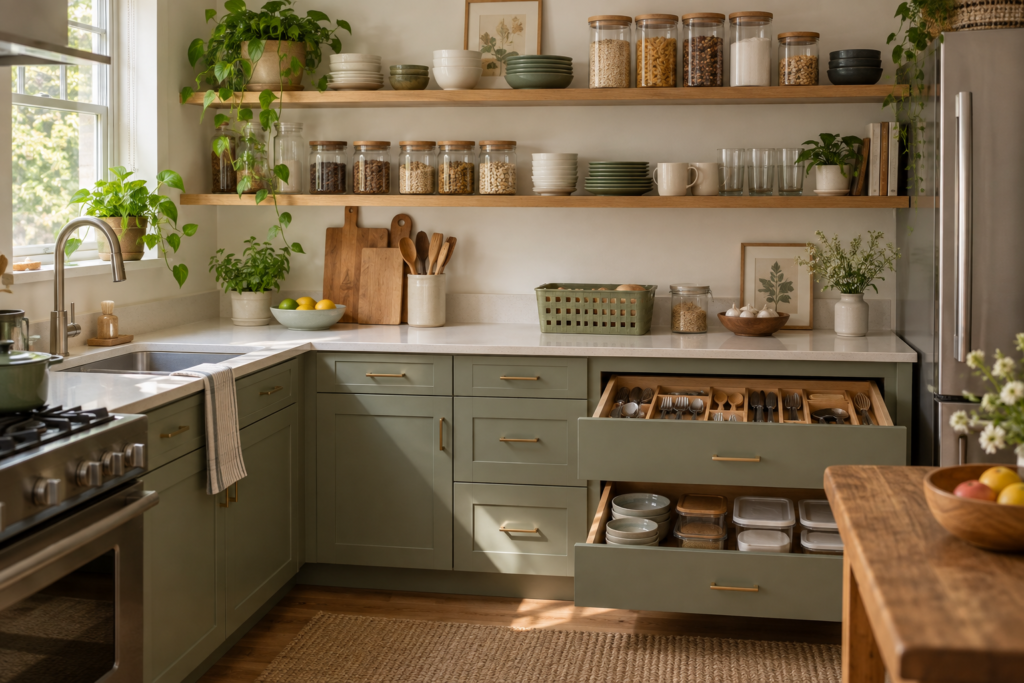
For food container lid storage, organize food container lids by matching every usable lid to its container, removing unmatched pieces from the active collection, and dividing the remaining lids into a few recognizable families. Store them upright when the location and lid shape allow, or keep complete sets together when that is easier. Test the system with clean containers returning from a normal wash before buying a purpose-made organizer.
A lid drawer becomes frustrating when it stores possibilities rather than dependable sets. Two transparent lids look identical but seal different boxes; a large round lid hides the small rectangular ones; a spare from a discontinued collection survives through several kitchen reorganizations. Sorting by colour may make the drawer look calmer without helping you pack lunch any faster.
The aim of this setup is to make the matching decision obvious. You should be able to choose a container for the food you have, find its correct lid, and return both pieces without rebuilding the cupboard. This guide concerns storage organization. Continue following each container’s own food-use, washing and heating instructions rather than interpreting an organizer layout as permission for a particular use.
Gather the whole collection before making categories
Bring together containers and lids from cupboards, the dish rack, lunch bags and other places you normally keep clean pieces. Include the occasional large boxes if they are part of the same storage zone. A drawer sorted without the missing half of the collection can appear spacious until the next dishwasher load returns.
Do not interrupt food currently stored in the fridge just to complete the exercise. Instead, leave a note identifying those active sets and reserve space for them. You can verify their matches when they return to the clean collection. This is better than assuming an apparently spare lid has no container and removing it prematurely.
Make three temporary groups: confirmed sets, pieces still awaiting a match, and items that need a condition check. Keep the uncertain group outside the new daily layout until you have resolved it. A small unresolved collection is easier to investigate than a drawer in which every piece remains a possible match.
Match by fit, not by resemblance
Pair each lid with the container it is intended to close. Use the manufacturer’s identifying marks where available, and verify the actual fit without forcing latches or stretching edges. Similar dimensions do not establish compatibility. Two product ranges from the same brand may have different rim profiles even when their boxes look alike from above.
For families with interchangeable lids, group the compatible containers deliberately. A shared lid can be convenient, but only when you know which boxes belong to that system. Write the family name or your own simple category on the organizer section rather than marking every food-contact surface. Keep any identifying label consistent with the product’s care instructions.
Place unmatched pieces in a temporary holding box with a review date chosen around your normal lunch and washing cycle. The point is to give active pieces time to reappear, not to create permanent storage for mysteries. When you review it, check whether the missing partner is actually still useful and whether a legitimate replacement is available.
Decide how many containers belong in the active zone
Count what the household uses between washing opportunities. Someone who packs five lunches in advance has different needs from someone who uses two boxes for leftovers. Include the sizes you genuinely use and the pieces normally occupied in the fridge. The correct amount is tied to your routine, not to a universal minimalist number.
Separate daily food boxes from occasional catering-size or holiday containers. If the largest pieces force you to move several small lids every morning, they are consuming a high-value location without contributing equally to daily use. An occasional-use shelf may suit them better, provided complete sets remain easy to identify there.
Avoid removing useful containers merely to fit an organizer you already bought. Establish the active collection first, then choose a layout that accommodates it. If the collection is still too large for the available space, consider whether some pieces duplicate the same role or are kept only because their matching status is uncertain.
Choose between separate lids and complete sets
Separate storage works well when containers nest compactly and the lids can stand in clear groups nearby. It reduces the volume of empty boxes but asks you to match two pieces each time. Complete-set storage uses more space yet removes that matching step. Neither method is automatically more organized; the useful choice depends on the routine it supports.
For frequently packed lunch boxes with several components, keeping the intended lid beside or with its base may prevent missing parts. For simple rectangular leftover boxes with shared lids, nested bases and upright lids may be more economical. A mixed system is entirely reasonable: complete sets for complex lunch kits, separate groups for straightforward food-storage containers.
| Layout | Works well for | What to watch |
|---|---|---|
| Upright lids beside nested bases | Several similar rectangular sizes | Enough room to lift a lid without snagging neighbours |
| Divided drawer sections | A low drawer close to food preparation | Drawer height and lid movement when it closes |
| Complete sets in a cupboard | Lunch kits or a small mixed collection | Extra volume and access to the lower sets |
| One removable bin per family | Multiple incompatible container systems | Bin width and space to grip it |
Measure the place where the lids will live
In a drawer, measure usable internal width, depth and height. Check the lowest part of the opening, not just the side-wall height. A lid that stands upright inside the drawer may still hit the cabinet frame as the drawer closes. Use the tallest lid as your test piece and close the drawer gently before committing to vertical storage.
In a cupboard, measure the shelf depth and the opening between hinges. A deep bin may fit on the shelf but be awkward to remove through the door. Consider the hand space needed to grip its front, particularly if it will sit beside a stack of containers. Leave the movement path clear rather than filling every gap with another small item.
Place lids close enough to bases that packing food does not involve crossing the kitchen. The two groups need not touch, but they should form one understandable station. If your main problem is limited cupboard room, the pantry-free kitchen storage guide can help evaluate nearby zones without treating the worktop as permanent overflow.
Build the first version with what you have
Use an existing clean, suitable tray or bin to test the footprint. Stand a few lids inside only if the container supports them without sharp bending or pressure on seals. A temporary divider can show the space each family needs, but it should not be used in a way that damages lids or interferes with the drawer.
Start with broad categories such as small rectangular, large rectangular and round. Do not create a slot for every individual lid unless that precision serves a real purpose. A system requiring every lid to return to exactly one narrow position can be difficult to maintain when different household members unload the dishwasher.
Position the most frequent category at the easiest point of access. A lid used for lunch every weekday deserves a better position than a large serving-container lid used monthly. Within each category, orient identifying edges or markings toward the person opening the drawer so selection relies less on lifting pieces to inspect them.
A worked setup for a mixed household collection
Imagine a household with four everyday lunch boxes, six rectangular leftover boxes in two compatible sizes, and two large round containers used occasionally. Their existing drawer contains all twelve lids in one horizontal pile. The lunch lids sit at the bottom because they are broad, so packing lunch requires lifting almost everything else.
The first change is to keep the four lunch sets together in an accessible cupboard section. The six rectangular lids stand in two loose groups beside their nested bases. The two large round sets move to the occasional-use shelf. This is an illustrative arrangement, not a recommended quantity for every household.
During a full washing cycle, one leftover lid repeatedly falls flat because its group is too wide. Rather than buying a complete new rack, the household narrows that section with a suitable movable divider. The experiment identifies the one feature a future organizer would need: adjustable support for a small number of lids, not more overall capacity.
Create a return routine that survives a busy kitchen
Let pieces finish the drying process required by your usual cleaning method before putting them into the storage arrangement. Avoid nesting damp components tightly and then forgetting them. The organizer should make inspection straightforward rather than hiding water in a closed pile. Continue following the container manufacturer’s cleaning guidance, especially for seals and removable parts.
When unloading, return lids by family first and size second. This is easier than searching for an exact decorative arrangement. If a particular lid does not fit its assigned section, check whether the section is overfull or the wrong family has been placed there. A small mismatch should trigger a correction rather than a new overflow pile.
Leave enough room for all the pieces expected after washing. A system that only works while several boxes are in use is not fully sized for the collection. Test the drawer at its fullest and remove one item from the back. If that movement is awkward, simplify the collection or revise the location before adding labels.
Label the decision people actually need to make
Useful labels distinguish compatible families or an unfamiliar category. Labels such as “blue clips” or a genuine product-family name can help when the visual difference is subtle. “Lids” adds little to a drawer that contains nothing else. Choose wording someone else can understand without needing an explanation of your sorting method.
Attach labels to the organizer where practical so they remain visible even when a section is empty. Keep them out of drawer-slide mechanisms and away from food-contact surfaces. If the collection changes, update the label rather than preserving an obsolete category because the original arrangement looked tidy.
For a shared kitchen, demonstrate the matching rule once using a real container. Ask another person to put away several clean lids without coaching. Their hesitation often identifies a category that is too subtle. The best label is the one that removes that uncertainty, not the one with the most attractive typeface.
When a dedicated lid organizer is worth buying
Buy when the trial layout reveals a specific missing function: lids need adjustable vertical support, a removable bin needs a better grip, or a drawer requires a lower profile. Record the dimensions of the proven arrangement and the largest lid before shopping. This protects you from buying a rack sized for an imaginary collection.
Check divider spacing, usable internal width, total height and whether the product suits your lid shapes. A rack shown with flat rectangular lids may not support thick clip-lock or domed lids in the same way. If the specifications do not answer that question, choose a retailer with clear measurements and suitable return information rather than assuming the photograph proves compatibility.
Sources and practical checks
Match by documented compatibility before sorting by size. The Snapware Total Solution lid listing lists the container models it fits. Similar-looking lids should not be assumed interchangeable, and forcing a lid is not a substitute for that match.
Questions about food container lid storage
Should I keep containers with their lids attached?
That can work for a small collection or multi-part lunch kits if it suits the products’ storage instructions and they are ready to put away. Separate storage is usually more compact for nesting bases. Compare the space saved with the extra matching step rather than following one rule for every set.
What should I do with a lid that has no obvious container?
Place it in a temporary review group and check active containers when they return from normal use. If no match appears, identify the original range before seeking a replacement. Do not force a similar-looking lid onto an incompatible base.
How many categories should I create?
Use the fewest categories that make matching reliable. Two compatible families may need two sections even if their lids are the same size. One interchangeable family may need only a broad small-and-large division. Compatibility matters more than a fixed category count.
Can I use a plate rack for lids?
Possibly, if the rack’s dimensions, support and intended use suit your particular lids. Test thick clips, domed shapes and the tallest piece. A plate rack’s name does not establish that it will fit in your drawer or hold flexible lids without awkward pressure.
What is the best final test?
Run one ordinary packing and washing cycle, then assess the collection at its fullest. You should find a correct lid without emptying the section and return it without rearranging unrelated pieces. For broader cabinet planning, continue through the kitchen and pantry guides.