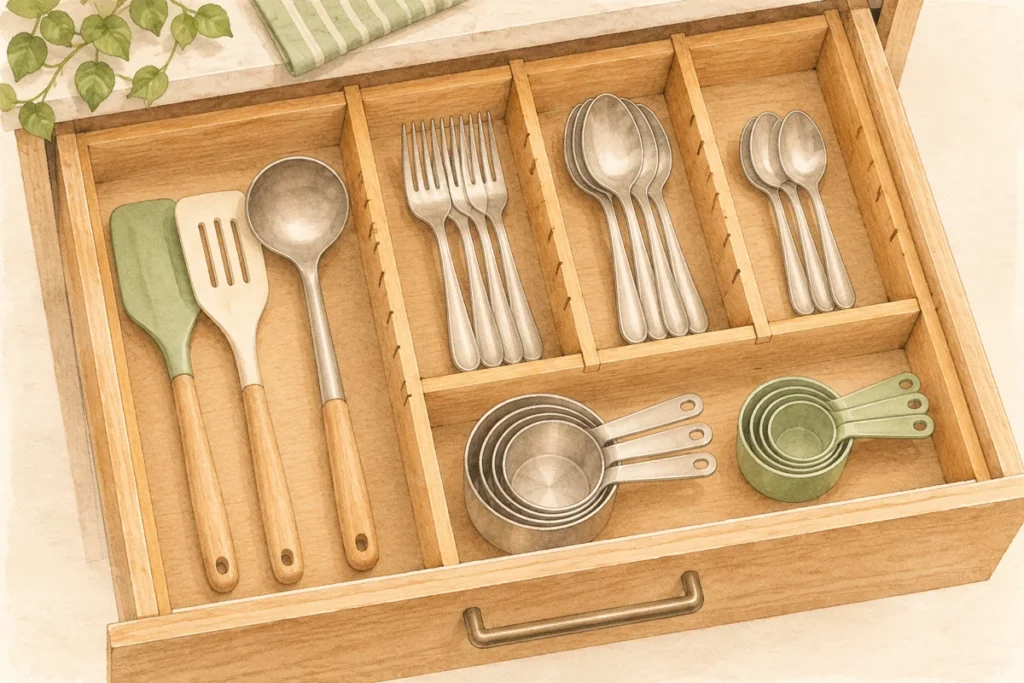
Sort the drawer by the tasks its contents support, measure its internal width, depth, and closing clearance, then lay out the largest utensils first. Use dividers to keep useful groups separate, leaving enough room to remove and return each item. Test the full drawer before fixing a layout or buying a matching set.
A divided kitchen drawer should make cooking and clearing away easier. It should not require you to align every utensil precisely or remove three tools to reach one. The right arrangement depends on the items you use, the drawer’s shape, and the movement of the drawer itself. A tray that looks ideal in a product photograph may waste space around a ladle or block a long pair of tongs.
This guide walks through the setup process from sorting to a working trial. It includes measurement examples and comparisons of storage formats, not claims of hands-on testing of specific products. For the wider room plan, start with our kitchen and pantry hub. Keep any specialist tools in storage appropriate to their own instructions.
1. Decide what this drawer needs to do
Empty one drawer onto an appropriate surface and group the contents by use. Separate everyday cutlery, cooking utensils, measuring tools, serving pieces, and items that have drifted in from other rooms. Include items currently drying or in the dishwasher when you assess capacity. Designing around a half-empty drawer is a common reason a new layout fails after the next cleanup.
Choose a primary job that fits the drawer’s location. A drawer beside the preparation surface might suit tools used while cooking. One near where you set the table might suit cutlery. These are starting ideas, not rules that override accessibility or the actual kitchen layout. Trace your normal movements and put the most frequently handled group where returning it is easiest.
Keep occasional tools from crowding the daily group
A large serving spoon used only for gatherings does not necessarily need the same convenient position as an everyday spoon. Move suitable occasional tools to a clearly identified alternative location if doing so frees the working drawer. Keep that location easy to find. Moving an item without assigning a new home simply transfers the searching problem.
Separate duplicates deliberately. Some households need several spatulas because they are used simultaneously; others have accumulated copies that rarely leave the drawer. Decide according to use rather than a universal item count. Do not remove another person’s tools without agreement, especially in a shared kitchen where different people cook in different ways.
Handle sharp and awkward items separately
Do not treat a knife blade as another loose object to squeeze between ordinary utensils. Use storage designed for the relevant sharp tools and follow the manufacturer’s guidance. A standard divider defines a compartment but does not automatically protect an exposed edge. Keep the choice of protective storage separate from the cosmetic decision about matching trays.
Large can openers, scoops, and tongs also need their actual working shapes considered. A tool may fit when squeezed closed but spring open during use. Arrange these pieces before filling the remaining space with smaller utensils, and avoid making a tight slot that catches moving parts every time the drawer opens.
2. Measure the drawer, not its front panel
Measure the inside width and depth at the points where the divider will sit. Include curved corners, sloping sides, screw heads, or other intrusions. Then check the usable height with the drawer closed. The decorative front can be taller and wider than the interior, so its dimensions are not a reliable guide to organizer fit.
Look at the route through which a removable tray must pass. A tray can fit inside yet be difficult to lift out beneath the counter edge. If you need to tip it sharply for cleaning, the contents may have to be removed first. That may be acceptable for some households, but it is a maintenance trade-off worth understanding before buying.
Record three sets of dimensions
- Drawer interior: clear width, depth, height, and any narrowing or obstruction.
- Largest utensils: overall length, widest head, handle projection, and resting height.
- Organizer: external footprint, usable compartment dimensions, divider thickness, and adjustment range.
Internal compartment measurements matter because thick walls can leave less usable space than the outside dimensions suggest. A tray advertised as wide may divide that width into narrow channels that reject your serving spoons. Ask whether the largest tool can be picked up comfortably, not merely whether it can be pressed into the compartment.
A simple planning example
Imagine a drawer with an internal width of 44 cm and depth of 46 cm. You want a long-tool lane 12 cm wide and two other lanes 14 cm wide each. Those lanes total 40 cm, leaving 4 cm for divider thickness and practical clearance. These are illustrative measurements. Check the actual organizer’s walls and adjustment mechanism rather than assuming the remaining space will be enough.
Now place a 39 cm utensil in the proposed long lane. It may fit lengthwise, but its head could still be too wide or too tall when the drawer closes. Rotate it only if the resulting arrangement remains easy to use. Diagonal placement can help an unusual item, but it should not prevent neighbouring tools from returning to their compartments.
3. Lay out the tools before adding boundaries
Place the largest utensils in the empty drawer first. Keep handles oriented so the usual user can identify and grasp them. Group items that are chosen together, such as measuring spoons and cups, without piling small pieces beneath larger tools. You are designing the retrieval movement, not just fitting outlines into a rectangle.
Use paper strips to mark possible boundaries during planning. They help reveal whether you need long channels, short compartments, or a mixed layout. They are not permanent dividers and should not be treated as proof of a product’s stability. Once the pattern looks workable, trial it with appropriate existing containers or the selected organizer.
Cutlery layout
Keep everyday cutlery categories easy to distinguish and give each enough room for the normal full quantity. A front or central position may suit the most-used pieces, depending on how the drawer opens and who uses it. Avoid stacking so high that the top layer catches the structure above. Check the layout after all clean cutlery returns.
Serving pieces often need a wider or longer compartment than everyday forks and spoons. Rather than forcing them into a standard cutlery tray, consider a separate section or another suitable drawer. A tray with fewer appropriately sized compartments can work better than one with many narrow slots.
Cooking-utensil layout
Create a lane for long tools and separate bulky heads where they collide. Tongs, ladles, and whisks can have irregular profiles, so arrange their natural resting positions rather than compressing them into a perfect row. Leave room to lift one piece without pulling a neighbouring handle. If this is impossible, reduce the category or use a different storage format.
Consider whether frequently used utensils belong in this drawer at all. A suitable nearby location may work better for an unusually tall or bulky tool, provided it does not crowd the work surface. The best setup can combine drawer storage with another appropriate location rather than insisting every cooking tool fit behind one drawer front.
Small tools and measuring accessories
Use shallow compartments for small items that otherwise disappear. A deep bin inside a shallow drawer can conceal the very objects you are trying to make visible. Group tools by a clear task and keep detachable parts together where their care instructions permit. Avoid creating a general small-parts compartment that collects unrelated objects from the whole kitchen.
If a tool has a removable sharp component, provide the appropriate protection rather than leaving it loose among measuring accessories. Cleaning and drying requirements also matter. Return items according to their care instructions and keep the organizer easy to remove when the drawer needs cleaning.
4. Compare divider formats
| Format | Useful for | Main compromise | Check before buying |
|---|---|---|---|
| One-piece tray | Stable, familiar cutlery categories | Compartment sizes may be inflexible | Usable channels and drawer closing clearance |
| Expandable tray | Using an adjustable width | Expanded sections may be shallow or narrow | Minimum and maximum width, locking and overlaps |
| Adjustable dividers | Long lanes for differently sized utensils | Need compatible surfaces and a secure fit | Range, contact pads, side-wall suitability |
| Modular small trays | Mixed tools and changing categories | Gaps or sliding may develop between pieces | Combined footprint and movement during use |
One-piece and expandable trays
A one-piece tray simplifies removal for cleaning and keeps its compartments in a fixed relationship. It works well when those compartments suit your actual tools. An expandable tray can use more width, but extra width does not automatically improve the central channels. Examine what expands and whether the added sections accommodate the items you intend to store.
Compare the fully assembled dimensions in the configuration you will use. Some products have overlapping panels or raised edges that affect usable height. Check the manufacturer’s instructions for expansion, cleaning, and any locking mechanism. Do not assume a tray can be trimmed or modified without compromising its function.
Adjustable dividers and modular trays
Adjustable dividers let you define long lanes with fewer fixed compartments. They can suit cooking utensils that do not fit a conventional cutlery layout. Their value depends on staying in place without inappropriate pressure on the drawer. Check the intended drawer materials and adjustment range rather than forcing an oversized divider into position.
Modular trays offer a flexible layout when categories change, but their combined external sizes must fit together. Test whether pieces shift during normal opening and closing. A suitable non-slip solution may help if permitted by the product and drawer instructions, but it should not hide a basic mismatch in dimensions.
5. Install and test before filling every compartment
Clean and prepare the drawer and organizer according to their instructions. Fit the chosen pieces without forcing them against the drawer walls. Load the largest tools first, then add everyday smaller items. Keep all moving parts and the drawer runners unobstructed. A divider should not interfere with the furniture’s normal movement.
Close the drawer slowly while observing the tallest contents. Stop if something catches; identify the exact point rather than pushing harder. Open and close it several times at your ordinary pace to check whether trays or tools shift. Then remove and return representative items from every section, including the rear corners.
Check the return route
Put away a normal group of clean utensils. If the process requires moving the divider or carefully balancing a tool, the section needs adjustment. A drawer must tolerate ordinary use by more than the person who designed it. Ask another household member to return the tools and note any uncertainty about their intended locations.
Keep labels optional and practical. They can help distinguish similar groups in a shared kitchen, but a complicated label system is unnecessary when the tool shapes make the compartments obvious. If people continually choose the wrong section, reconsider the category boundaries or location before adding more instructions.
6. Review after a normal cooking cycle
Use the drawer for several meals and at least one full cleanup. Notice tools left on the counter because putting them away feels inconvenient. Look for stacked handles, shifting trays, and categories that overflow when everything is clean. Change one boundary at a time so you can see whether the adjustment solves the problem.
For ongoing maintenance, remove unrelated items when they appear and check the layout when cooking habits change. A new bulky utensil may require a different lane rather than another organizer. The whole-home storage reset guide helps decide where displaced or occasional items should go without creating a second cluttered drawer.
Questions about kitchen drawer dividers
Should I measure before buying kitchen drawer dividers?
Yes. Measure the internal drawer dimensions, the available closing height, and the actual utensils. Compare those with both the organizer’s external footprint and its usable compartments. The drawer front and a product’s overall width do not establish whether your tools will fit.
Are expandable trays better than separate dividers?
They serve different layouts. Expandable trays provide defined compartments and a wider footprint, while separate dividers can create long custom lanes. Choose according to the tools and drawer structure. Check how expansion works and whether the added sections are useful to you.
How do I keep long utensils from tangling?
Give them a sufficiently wide lane and arrange their natural resting shapes so heads and handles do not interlock. Avoid compressing spring-loaded or bulky tools just to fit them. If removing one utensil still moves several others, reduce the group or assign an appropriate different location.
Can I use a regular divider for kitchen knives?
A regular divider does not automatically protect knife edges or users from exposed blades. Use storage designed for the relevant knives and follow its instructions. Plan that protected section separately from ordinary loose cutlery and cooking utensils.
How many compartments should the drawer have?
Enough to keep useful categories distinct, without creating slots so narrow that returning items becomes difficult. Start with fewer broad groups and add a boundary only when mixing or shifting causes a real problem. The correct number depends on your tools and routine.